How to Properly Perform Siding Installation
Siding can dramatically increase a home’s curb appeal. It also protects and insulates the building to reduce energy costs.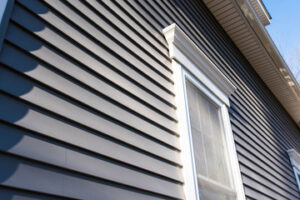
Begin siding installation at the back of your home, working towards the front. Install a starter strip, then nail the first panel to it, being sure to leave a quarter-inch space for corner posts. Visit Website to learn more.
A home’s exterior plays a vital role in its protection and aesthetics. If it is time to replace your siding, knowing the process ahead of time will help you plan accordingly and avoid potential problems.
Before beginning, it is a good idea to discuss your project with your contractor. This will give you an understanding of what to expect and will allow you to ask any questions that you may have about the procedure. In addition, your contractor will be able to provide you with a more accurate estimate of cost and timeline.
The first step of the process is to prepare the wall for siding installation. This includes trimming any shrubs and trees that are close to the walls, and removing any outdoor furniture or other items that could get in the way of the construction crew. It is also a good idea to remove any flower beds or garden areas that could be affected by dust or debris stirred up by the crew during the installation process.
Once the wall is prepared, the next step is to sheath the first few feet of the walls with insulation. This will help keep the home more energy efficient and will prevent moisture damage to the wood structure. Then, a metal starter strip is installed along the bottom of the wall and then the siding is nailed to this. The bottom lock of each piece hooks underneath the starter strip and is secured to the sheathing with nails every 16 inches.
After the siding is nailed to the sheathing, any trim pieces for doors or windows are installed. These can be anything from simple surrounds and lineals to ornate mantels. If angled cuts are needed, it is a good idea to figure out the angles one time on a scrap piece and use this as a template for the remaining angle pieces on the wall using a rafter square.
At this point, the crew will inspect the walls for any water rot or sheathing damages that need to be repaired before continuing. This is a crucial step to ensure that the new siding will be securely attached. Once the repairs are done, any necessary sealants or caulking is applied. Nail holes are then filled with bondo or putty, and the walls are primed and painted.
Removal
It takes a lot of time to remove siding, especially when the weather is bad. But it’s important to take your time to ensure the job is done correctly and without any damage to your home. You’ll want to inspect the wall beneath each panel as you’re removing it, looking for any rot or insulation problems that may need to be addressed.
Before you begin removing vinyl siding panels, start by setting up a work area. Clear away any potted plants or outdoor furniture that could get in the way of the workers, and spread a tarp on the ground where you’ll pile the removed panels. This will prevent them from becoming a tripping hazard as they are moved to and from the work site.
The first step in removing siding is to unlock the lower hems of each panel with a zip tool. Insert the zip tool into the bottom edge of the lower hem and apply pressure, twisting and unhooking it from the panel above. Continue doing this on each overlapping corner of the vinyl siding until all the lower hems are free. Once they’re all loose, you can pull off the panel that’s being removed.
When you’re ready to remove the next panel, use your zip tool to unhook the lower hem of that panel from the one above it, then carefully lift the top piece and look under it for nails anchoring it to the wall. Once you’ve found the nails, remove them using a flat pry bar or hammer. If you can’t find the nails, check the back of the panel for a nail marking pattern that indicates where the nails were located on the wall.
As you remove each panel, make sure to stack it neatly in an organized manner so that you can keep track of it. Keeping the panels in order will make it much easier to reinstall them when the new installation is complete.
As you’re removing the siding, be mindful of any electrical boxes or pipes that are behind it. Be sure to disconnect any wiring or gas lines, and don’t touch any pipes that could be leaking.
Installation
Once you’ve vetted the right contractor, a contract should be drafted and signed to establish the scope of work and payment schedule. This provides a clear understanding of what’s included, helps prevent misunderstandings and allows for a paper trail in case a dispute should arise later.
Depending on the type of siding you choose, the installation process can take a few days to several weeks. Prior to the installation, your contractor may need to clear the area around your home for access and safety. They’ll also need to trim trees, shrubs and other plants that might interfere with the installation process. You should also cut the grass to a reasonable length as this makes it easier for the crew to clean up at the end of each day and protects your family from stray nails or other sharp objects.
Before the first piece of siding is installed, the contractor will need to install soffits and fascia. They’ll start by nailing a metal starter strip to the fascia, followed by a foam sheathing strip. Next, they’ll attach the gutters and downspouts. After that, they’ll install a water-resistive barrier. This is critical to avoid water intrusion that can damage your siding.
After the barrier is in place, they’ll sheath the fascia and soffits with insulation. They’ll then install a drip edge to the bottom of your home’s siding, which will keep moisture away from the foundation and protect it from rot. They’ll also apply caulking to any gaps or joints.
The next step is to sheath the walls of your home. Then, they’ll install a starter strip. This is a piece of plywood that’s sheathed with insulation and has a lip at the bottom to hold the first piece of siding in place. The starter strip is nailed to the wall at the chalk line, and then sheathing strips are placed over it.
Before you can install the first piece of siding, you’ll need to trim any windows and doors. Then, you’ll need to add J-channel where necessary. This is to protect things like power meters, vents and water faucets. You’ll also need furring strips where necessary to make sure the siding fits correctly. These are strips that run along the top and sides of the obstruction to create a gap for ventilation.
Maintenance
Your new siding should last a long time with proper maintenance. Regular inspections and timely repairs can save you both time and money, and keep your home protected from the elements. Whether you have vinyl, fiber cement, or engineered wood cladding, you can keep it looking and functioning like new with these simple tips:
First and foremost, always remember to work safely. Wearing protective gear, working on a stable surface, and following all of the manufacturer’s recommendations for safety will prevent accidents and damage to your cladding.
When inspecting your siding, look for signs of moisture problems and other issues such as dents, cracks, or loose panels. These can allow moisture to penetrate the surface, leading to rot or mold. Likewise, peeling paint is a sign that it’s time to repaint.
It’s also important to check that your gutters are working properly. If they are full of debris, they can cause overflow and water damage to the underlying structure. In addition, make sure that any plants and shrubbery are trimmed away from your siding. Overgrown bushes can rub against your siding, leading to deterioration and the accumulation of dirt and debris that can be difficult to clean.
Finally, make sure that your caulking is in good condition. A high-quality caulk will prevent moisture from infiltrating your walls, protecting the underlying structure and ensuring that your siding remains watertight. It’s recommended that you use a weather-resistant sealant such as polyurethane for best results.
Lastly, don’t neglect to treat your wood siding with a stain or paint every 4 to 6 years. These treatments will help protect it from the sun’s harsh rays, and prevent moisture, mold, and rot.